No matter the genre, no matter the complexity or depth, every game has its own world to build. Some games may simply desire to have a place to showcase custom uniforms or share some brief information about the current mission settings. Others may create broad universes with volumes of information to aid the game's players with capturing the full scope of the world in which they are exploring.
Nova's Wiki, powered by Thresher, enables any set of players to easily create, collaborate, and deploy the information they wish to share without having to possess any programming knowledge. Robust pages can be easily created and styled with a simple WYSIWYG (What You See Is What You Get) editor.
Tip
For the purposes of this guide, we are assuming that you are using a fresh Nova install, with no pages, categories, or other editing yet performed on your wiki.
Quick Tour

Upon a fresh installation of Nova, the wiki's basic structure will appear very sterile. Everything you need, however, is available for the game's users to start creating.
The main page appears with a simple header and paragraph, immediately informing you that Thresher is available for service. The navigational system is also installed and ready, giving you immediate access to the wiki's powerful functionality.
Recent changes

As wikis grow, it can be difficult for anyone, especially the game's players, to keep track of changes, whether they be new articles or updates to existing pages. Thresher's Recent Changes system simplifies this herculean task and allows anyone to see any new changes at a glance.
Users can sort changes by recent updates or recently created, allowing them to search for specific changes.
Each entry will also feature an update summary, provided the last user entered a comment into that field.
Categories

The Wiki Categories page provides quick access to all of the categories available in the wiki. If a page is not added to a category, it will automatically be added to the Uncategorized listing. By clicking on a category, Nova will show you all pages attached to that category.
From this page, you will also be able to edit any of the categories in the system, or add new categories of your own.
Tip
Pages can have more than one category assigned to them. If you have multiple options available, don't be pressured to choose only one category. Add all categories that may apply so that your fellow players can find the page more quickly in the future.
Manage pages

The Manage Wiki Pages page is available to all players, allowing everyone to see a full list of pages that are saved in the wiki.
From this page, any active user can:
- Create a new page
- Filter the pages based on:
- Standard: any page created by any user.
- System: any page created by the system installation and required for operation.
- Restricted: any page "locked" by the management team to prevent unnecessary editing by any user.
- All: a comprehensive list of all pages in the wiki.
- Search existing pages
- Clean up drafts of existing pages
Each page in the listing will have a set of options available to you.

From Left to Right, these options are:
- Information: displays information about when the page was created and who it was created by, and also the last time when and who updated the page last.
- History: displays a complete list of the page's edit history. From this list, you can see the previous versions of the page as long as the drafts have not been cleaned up (purged).
- Lock: restrict edit access to select access roles already available within Nova. This feature is reserved only for System administrators.
- View: moves the user from the Manage page to view the selected page in full.
- Delete: deletes the page. This feature is reserved for Basic and System administrators.
- Edit: allows you to edit the page.
Manage categories

Tip
This page is available only to users with the Basic or System administrator access role.
From this page, you will be able to add, edit, and delete any wiki category. When categories are available, you will be able to see the name of the category, as well as a description that will let users know what the general purpose of that category is for.
Editing the wiki
With our tour complete, let's add our first new page in the wiki. Our game follows the adventures of the USS Enterprise-D from the Star Trek universe. In our game, we are about to encounter a dangerous species called the "Borg." We need to give our players some information on this species so that they know what to expect.
Creating a category
Since this is our first wiki article, we will need to create a category to put this article in, as well as future pages for other species that we'll encounter in later stories.
Navigate to the Manage Categories page, which is located on the Wiki's sidebar. From there, select Add Wiki Category from the top of the page.
Whenever you add or edit a category, the following options will be available:
- Name: the name of the category.
- Description: a summary of the purpose of that category.
We will be creating a category for Alien Species. Once you've entered your information, click the Add button and the category will be immediately available in the wiki.
Creating a page
Let's start building our page on the Borg. Navigate to the Create New Page on the Wiki's sidebar. Whether you are creating a page, or editing one, the following options will be available:
- Title: the name of the page. This field is required for the page to be published.
- Summary: a short preview or summary of the page that will show up in page listings to give users an idea of what information the page contains.
-
Content: all of the page's content will be entered into this WYSIWYG box. Unlike mission posts, the wiki will require ALL content to be entered as if you were writing an HTML page.
- If you are not familiar with HTML language, even in a basic form, the content box provides handy tools to help you create the page, including headings and subheadings, text formatting, lists, images, and links to other sites.
- The content box also two handy tools, located to the far right of the toolbar:
- Clean: removes unused or "broken" HTML tags or code throughout the content box. This icon looks like an opening and closing tag with a small red delete icon.
- Preview: generates a preview of the finished page below the content box so that you can see what your page would look like. This is handy for identifying HTML formatting that you may have missed, such as paragraph breaks. The Preview icon looks like a green checkmark.
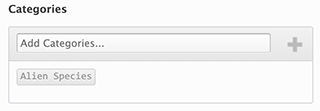
- Categories: a selection of categories already available within the Wiki. Note that the category for Alien Species is already here and ready for use. You can also add categories directly from this box.
- Comments: determine whether you will allow others to leave comments on your page, or if you want to restrict discussion.
Tip
Thresher does not store images, nor does it have the ability for any user to upload pictures to it. If you wish to add images, you will need to upload them to a desired location, such as to a folder on your webhost using an FTP program, or use Nova's image uploader and store the image(s) in a section such as the Specifications or Tour categories. You will need the URL of the image and its location to enter into your wiki page.
Let's work on creating our page. Add a title and a summary. As you work in the content box, you'll notice that this is not a normal text box.

Enter the content of the page, being sure to use the paragraph icon in the toolbar whenever you add a new paragraph, or one of the H1-H6 icons to establish your headings and subheadings throughout the page. Headings for a page on the Borg might include Physiology, History, and Technology. Subheadings under History might include Origins, Encounters, and Battles.
Now that our content has been added, let's add our categories.

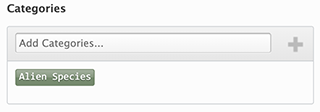
Since we made Alien Species earlier in this guide, it is already listed in the box, but it is unselected. To add this page to that category, click on Alien Species.

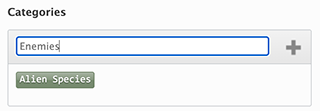
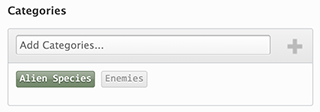
The Borg are also an enemy of the Federation, and therefore an enemy of the crew of the Enterprise. Let's add an Enemies category. In the Add Categories... field, type "Enemies" and click on the plus icon.

Once added, the category will not be automatically selected. You will need to click on the new category in order to add this page to it.

When all information is added, and you are satisfied with how your page looks, click the Create (or Update if you are editing a page) button at the bottom of the page.
Tip
Don't be afraid to save your work! Many of us like to wait until our page is perfect before publishing, but many unfortunate things can happen in our pursuit of perfection. If your connection to Nova's Wiki is interrupted, there is a possibility that you can lose your work. The wiki does not have an auto-save feature, so please be prepared to save your work as you proceed.
Whenever you save your article, you are publishing an update to the Wiki. The benefit of this is that you can walk away from your computer if you need to and pick right back up where you left off, or you can pass the article off to someone else to continue building.
Congratulations! Your page on the Borg is now available for anyone who visits your site to read!
Editing the main page
To edit the main page, you will have to first navigate to Manage Wiki Pages. Locate the page Welcome to Thresher by one of two ways:
- By finding Welcome to Thresher in the list of pages; or
- Using the search bar underneath the header.
Once you have located the page, select the Edit icon. Make your edits, and then click Update at the bottom of the page. To see your edits, navigate to the Main Page.
Tip
You cannot delete any of the wiki's system pages as these pages are required for the wiki to remain functional. You can, however, change the title and description of these pages. If you do rename them, make sure to remember what you name them to so that you can find them more easily when future edits are required.
Helpful links
HTML is among the simplest of the web programming languages, but it has its own complexities. There are plenty of sites that will allow you to type and format your page content as if you were composing within your favorite word processor. Once you are done, these sites will generate for you all of the HTML code that you can then copy and paste into Nova's wiki. Be aware that your formatting may not transfer over completely to Nova, but the results should still be favorable.